




home about recipes how-to bookstore contact
Showing posts with label recipes. Show all posts

Thursday, July 16, 2009

Aunt Rosie's Banana Bread and Mixingbowl.com

Great Aunt Rosie's banana bread

Today's post is a two sided post. First I thought I'd share one of my most favorite recipes, my Great Aunt Rosie's banana bread recipe that I've adjusted just a touch (I can never leave a recipe alone, lol). We've been making this recipe since I was a little girl and it was the way we always used up the "icky" bananas that had gotten too ripe. By adding a cinnamon sugar topping before you bake it, it makes the yummiest crust, and I've been known to pick it off before eating the bread :D.

The second part of the post is to talk about mixingbowl.com. I love this site. Its a great place to find and share recipes and it has an added bonus of contests! Who doesn't love contest, and this is where I need your help! I've entered this banana bread recipe into The Best Banana Bread Challenge over there and to win you need to get people to vote for you. Your friends, your family, your third cousin twice removed, you get the picture. So if you could please head on over to www.mixingbowl.com and vote for Aunt Rosie's Cinnamon Banana Bread I would be forever grateful. While your there check out all of the great recipes and maybe enter yourself into on of the many contests they have!

Aunt Rosie's Cinnamon Banana Bread

Ingredients:
1/2c. butter or margarine
1 c. sugar, (I usually use brown sugar instead)
2 eggs
1 c. ripe banana, mashed (approx. 3 medium)
1 tsp vanilla
2 c. flour
1 tsp baking soda
3/4 tsp salt
1/2 cup milk + 1/2 tbsp vinegar or 1/2 cup buttermilk
1 tsp cinnamon (this wasn't in her recipe I just like it, and its optional)

Cinnamon sugar topping (optional)
1 tsp cinnamon
1/4 cup sugar

Directions:

If making your own buttermilk put 1/2 tbsp vinegar in 1/2 cup measuring cup and fill the rest of the way with milk, set aside.

Spray two loaf pans (8" x 4") with cooking spray or line two muffin pans with cupcake liners.

Cream together butter and sugar. Add in mashed banana, egg, and vanilla and mix until combined. Sift together flour, baking soda, salt, and cinnamon. Mixing the rest of the way by hand, add half of dry ingredients and mix and then half of the milk and mix. Do the same with the other half of dry and wet. Do not over mix!

Evenly divide batter into loaf pans or muffin tins.

Combine the 1 tsp cinnamon and 1/4 cup sugar and
sprinkle top of loafs or muffins generously with cinnamon sugar before baking.

Bake at 350F. For loaves bake for 50-55 minutes or muffins 25-30 minutes or until knife comes out clean.

Enjoy!

Thursday, May 7, 2009

Lemony Lemon Bars

Lemony Lemon Bars

I LOVE lemons and I LOVE Ina Garten! That being said I was in the kitchen the other day and I had a bottle of Lemi-shine on the counter (if you have hard water spot problems in your dishwasher you should try this stuff!!) and it put me in the mood to make something lemony. I know, nothing like dishwasher additives to put you in the mood to bake, i'm weird like that :). So I remembered that Ina had a very popular recipe for lemon bars that I hadn't tried yet. I don't think i've tried a single recipe of hers that wasn't either fantastic or at the least really, really good. These lemon bars are no exception! The crust is rich, flakey, and buttery without being too much so, and the filling is not too sweet and not too tart and oh so lemony good!! At first I was a little worried about the 3 cups of sugar required in the filling, but hey, her recipes have never failed me in the past so I went with it. I'm glad I did because I think the filling would have been a little too tart if I had cut back any.

A couple of hints when making this are: Make sure your butter is room tempurature. To do this, place it on a plate in the microwave and heat in 5 second increments turning onto a new side each time and checking after each time until its just soft but not starting to melt. To make your eggs room temp quickly, place them in a bowl or measuring cup and get your tap water as hot as it will go. Fill up the cup with the hot tap water so it covers the eggs and let them sit for about 4 mintues and you have room temp eggs without the very long wait!

One very important note to the recipe is the eggs! I read a lot of the reviews on the food network site and some people were having problems with the filling setting. When baking and using extra-large vs. large eggs there are some recipes that you can get away with just substituting one to one but I don't think this is one of those recipes. I would either recommend using the extra large eggs or do what i did and use 7 large eggs (I never have extra large eggs and I didn't want to have to go out and buy them, lol), because the eggs are what make the the filling set.

Lemon Bars
Ina Garten Food Network 1999

Ingredients
For the crust:

1/2 pound (2 sticks) unsalted butter, at room temperature
1/2 cup granulated sugar
2 cups flour
1/8 teaspoon salt

For the filling:

6 extra-large eggs at room temperature
3 cups granulated sugar
2 tablespoons grated lemon zest (4 to 6 lemons)
1 cup freshly squeezed lemon juice
1 cup flour
Confectioners' sugar, for dusting

Directions

Preheat the oven to 350 degrees F.

For the crust, cream the butter and sugar until light (about 2-3min) in the bowl of an electric mixer fitted with the paddle attachment. Combine the flour and salt and, with the mixer on low, add to the butter until just mixed. Dump the dough onto a well-floured board and gather into a ball. Flatten the dough with floured hands and press it into a 9 by 13 by 2-inch baking sheet, building up a 1/2-inch edge on all sides. Chill. (I chilled in the freezer for about 5 minutes)

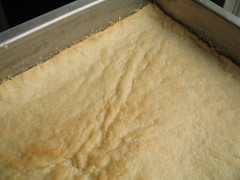
Bake the crust for 15 to 20 minutes, until very lightly browned. Let cool on a wire rack. Leave the oven on.

vvv 001


For the filling, whisk together the eggs, sugar, lemon zest, lemon juice, and flour. Pour over the crust and bake for 30 to 35 minutes, until the filling is set. Let cool to room temperature. (important or they will be hard to cut!!)


vvv 022


Dust with confectioners sugar.

Enjoy!!

Friday, April 17, 2009

Best Ever Chocolate Cupcakes

Well i'm ashamed to say that I am hopelessly addicted to P-Dub, and her cows and her punks and her yummy looking recipes that make me want to go cook something everytime I take a look at her website. For all of you who haven't yet read her blog, I would highly recommend it! but be warned its addictive! she has this sense of humor and down-to-earthness about her that is so refreshing. Go check her out, the pioneer woman, after you read the rest of this of course :).

Now the reason for this post. She recently had Bakerella come to the ranch and make cupcakes and thats where I found this recipe for her Best Chocolate Sheet Cake Ever. She made the recipe into cupcakes for them to decorate, and they had the nicest little dome and it was made up of ingredients that I always have on hand. So i decided to head into the kitchen and bake the family up a batch of them. I only made a half batch because although after trying them and wishing I had 12 more of them to eat, my hips are glad I only did half.


PW's Best Chocolate Sheet Cake Ever (Cupcake edition)
(this is a 1/2 recipe that yields 12 cupcakes)

1 stick unsalted butter (she used salted, but i don't ever have salted in the house)
2 heaping tbsps cocoa powder
1/2 cup boiling water
1 cup flour
1 cup sugar
1/2 tsp salt (adjusted because I used unsalted butter)
1/4 cup buttermilk ( or 1/4 cup milk and 1/2 tsp vinegar)
1 egg
1/2 tsp vanilla
1/2 tsp baking soda


ooo 005

Preheat oven to 350F/180C

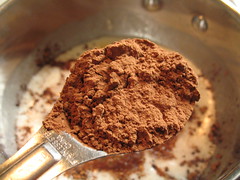
In saucepan melt butter. While doing that put 1/2 cup of water in the micro. to boil. (takes about 1-2 minutes in mine). Add cocoa to butter and stir. Add in boiling water and let boil for 30 seconds. Turn off heat and set aside.

In a large bowl mix together flour, sugar, and salt. Pour in chocolate mixture and mix together just until combined.

In glass measuring cup measure out buttermilk (or make sour milk mixture) add in egg and beat. Add in vanilla and baking soda and mix together well.

Pour into flour/chocolate mixture and mix well.

Divide into 12 cupcake papers and bake for 18-20 minutes or until knife comes out clean.

I didn't use the Frosting she used for her sheet cake, i just used my old standby chocolate frosting.

I will have to say these are really as good as she says they are. I will have to try out the sheet cake sometime with her frosting too! I'm sure its just as amazing!

Now go make some of these! Trust me!

Saturday, March 21, 2009

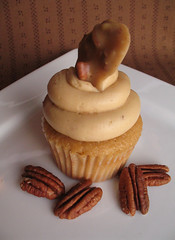
Gimme some brown sugar and praline, cupcake!


IronCupcake Challenge Nuts & Seeds

Well I decided to take the plunge and enter a cupcake in THE one and only cupcake challenge. the IRONcupcake challenge :) So I got to working in the kitchen and came up with these sweet little cupcakes.


Gimme some brown sugar, cupcakes

3 cups cake flour
1 tsp salt
1 1/2 tsp baking powder
1 1/2 cups brown sugar
1/2 cup dark brown sugar
6 oz. (1 1/2 sticks) unsalted butter, room temperature
1/4 cup sour cream
1 cup milk
4 eggs, at room tempurature
2 tsp pure vanilla extract

Directions

Preheat oven to 350F. In mixing bowl sift in cake flour, salt, baking powder, and brown sugars and mix for 30 seconds on low speed to combine. Add in butter and sour cream and mix for about 30 more seconds. In a seperate bowl whisk together milk, eggs, and vanilla and add it to the flour mixture in 2 parts mixing thouroughly and scraping the sides after each addition. Line cupcake pans with paper liners and fill 2/3 way full. Bake for 18 minutes or until toothpick comes out clean. Cool on wire rack. Makes approx. 30 cupcakes

Pralines


1 1/2 cup pecan halves
1 1/2 cup packed light brown sugar
1/2 cup sugar
1 cup heavy cream
1/4 tsp salt
2 tbsp unsalted butter
1 tsp pure vanilla extract

In a 300F oven toast pecan halves on a foil lined cookie sheet for about 8 minutes checking often because they burn easily! Let cool and chop roughly ( I did this so I could have smaller pralines to fit on top of my cupcakes, but you don't have to do it.)

In a medium heavy bottomed sauce pan combine brown sugar, sugar, heavy cream, and salt. Cook over medium heat until the sugars dissolve and mixture starts to come to a boil, making sure to stir occasionally.

Continue cooking until mixture reaches 235F-240F on a candy thermometer or soft-ball stage when small amount is placed in water, about another 15-20 minutes. Be very careful with this step, as overcooking will cause a grainy texture!

Remove from heat and add butter, vanilla, and pecans. Stir with a wooden spoon contiuously for approx. 3-4 minutes until mixture thickens enough to be scooped out and not be too runny. I used a cookie scoop to get even, small pralines, but 2 spoons will work too. You need to work very fast because the mixture will set up in the pan if you don't. If you have two people that can scoop all the better!

Brown Sugar Praline Buttercream
(Adapted from Marthastewart.com)

4 large egg whites
1 cup packed light-brown sugar
1/4 teaspoon salt
1 1/2 cups (3 sticks) unsalted butter, room temperature, cut into tablespoons
1 tsp vanilla
8 pralines chopped finely (recipe above or purchased ok too)


In a heatproof bowl set over (not in) a pan of simmering water, whisk together egg whites, sugar, and salt. Cook, whisking constantly, until the sugar has dissolved and the mixture is warm to the touch.

Transfer to the clean bowl of an electric mixer with whisk attatchment. Beat on medium speed until fluffy and cooled, about 15 minutes.

Raise speed to high; beat until stiff peaks form. Switch to paddle attatchment and reduce speed to medium-low; add butter, 2 to 3 tablespoons at a time, until fully incorporated. Add in vanilla. Fold in praline pieces with spoon.


Ok now here's what I need you to do! Head on over to NO ONE PUTS CUPCAKE IN A CORNER and vote for your top 3 favorites (hopefully mine will be one of them :D ) Voting starts Sunday, March 29 at 8 p.m. and runs through Friday, April 3 at 12 noon.


The winner will recieve these fabulous prizes:
-A Bunnycake Easter Plushie by DOGBONEART.
-A whimsical piece by CAKEASAURUS.
-as well as a pair of cupcake earrings from LOTS OF SPRINKLES.
-a collection of all new printed cupcake liners, 200 in all from Sweet Cuppin' Cakes Cupcakery.
-PLUS, IronCupcake:Earth can not forget our good friend, CAKESPY, who is now going to be doing a piece for our winner each month until further notice - sweet!
-HEAD CHEFS by FIESTA PRODUCTS
-HELLO CUPCAKE by Karen Tack and Alan Richardson
-JESSIE STEELE APRONS
-TASTE OF HOME books,
-a t-shirt from UPWITHCUPCAKES.COM


Iron Cupcake:Earth is sponsored in part by 1-800-Flowers . And as a special thank you, we would like to once again thank DIANAEVANS for her participation in the February challenge. An incorrect link was posted and we want to be sure that she gets the recognition she deserves. Thanks again Diana!

NOW DON'T FORGET TO VOTE!!

Saturday, March 14, 2009

Modeling Marshmallow Fondant Recipe

I've had quite a few requests for the recipe that I use for my cupcake toppers as well as for all of my sculpted miniatures and larger pieces. I've also had people ask me, "how do I know which sugarpaste (gumpaste, fondant, 50/50, or enhanced fondant) do I use for the different applications."

Well guys, I am by no means an expert, but here's how I do things. All of my cupcake toppers are made out of an enhanced marshmallow fondant recipe that i've come up with. For items that need to be very stiff, I will use a straight gum paste that I make out of this
powder, and if I need a piece to dry very hard but I need a little more working time I will mix 50/50 fondant and gum paste together. The only time i use straight fondant is when i'm covering a cake or cookies.

Now if you don't like to make your own fondant Lorraine (aine2) has a wonderful recipe
here that she uses to make all of her amazing creations using premade fondant and cmc or tylose powder. But if your like me and love to make marshmallow fondant, here is my recipe for my modeling marshmallow fondant. This is what you will need to make it:


Modeling Marshmallow Fondant

16oz pkg miniature marshmallows
2lb bag confectioners sugar ( I usually go for dominos or C&H, but thats just personal preference)
2 tbsp Gum paste powder mix (wilton also has one, i've just never used it)
1 tbsp vanilla extract (you can use clear if you need a really white fondant)
2 tbsp shortening (for hands and coating outside of fondant)
8qt. bowl (you can use your countertop too, I just don't like the mess)
2.5-3qt. microwave safe bowl
sifter
Plastic wrap
Ziploc bag


-Start out by putting the vanilla in bottom of bowl.
-Add pkg of marshmallows.
-Microwave on high for 1 minute and stir.


-Contiue microwaving in 30 second intervals stirring after each time, until completely melted.
-Over 8qt bowl (or countertop) sift the confectioners sugar (leaving about 1-2 cups in the bag, because you can always add more), making sure to cover entire bottom .


-Dump all of the melted marshmallows into center of bowl trying not to let it touch the sides ( its ok if it does, were just trying to keep it from sticking)
-Now is a good time to measure out 2 tbsp of gum paste powder and have it off to the side ready to go, because your hands are going to be very messy.
-Take about 1 tbsp of shortening and grease up your hands very well.
-Go around the sides and fold the marshmallow and powdered sugar into itself. Your trying to form a solid mass without too much stickiness.


-Keep doing that until it forms a more solid mass.
- Make an indent in the center and dump the gum paste powder into it.


-Keep kneeding and squishing until it is a pretty stiff consistancy.
-Coat the outside with shortening and wrap in platic wrap.
-Put in zip bag and let rest for at least 12 hours.
-Now if you find that your modeling fondant isn't stiff enough for modeling after letting it set. you can always just knead in a little more powdered sugar, wrap it and let it rest for a few minutes before working with it again.
-On the flip side, if you think its too stiff, you can add some shortening to it and I use my microwave a lot in 5 to 10 second increments to soften it up to make it more workable.
This is also the exact way I make my regular marshmallow fondant just skipping the gum paste powder step. I can make a batch in less than 10 minutes start to finish and i have almost no mess to clean up. Just the dishes :).
I hope that helps answer some of your questions, and until next time. Happy fondanting!

Sunday, March 8, 2009

Weekends in the Kitchen: Raspberry and cheese danishes


Well i've been trying to challenge myself when it comes to baking lately so I went to the library this weekend and checked out several books. One of them was this one Better Homes and Gardens Old-Fashioned Home Baking. It looked like there were a lot of good recipes in there so I went through it and decided on the Quick-method danish pastry (I might want to challenge myself, but i'm not completely crazy, lol). I figured if the quick method turned out ok then I would eventually try out the classic method when I had a little more time. The directions seemed pretty straight forward and I followed the directions to the T (which is unusual for me). I'm telling you these turned out AWESOME!!! This probably isn't a recipe for a beginning baker, but if you have a little knowledge of baking, i'd say give it a try.

Quick-Method Danish Pastry

Better Homes and Gardens
Old-Fashioned Home Baking

1 1/2 cups cold butter
3 cups all-purpose flour
1 1/2 cups all-purpose flour
1 package active dry yeast
1 1/4 cups light cream or milk
1/4 cup sugar
1/4 tsp salt
1 egg
1/4 to 1/2 cup all purpose flour

Cut butter into 1/2 inch slices (important). In a bowl stir butter slices into 3cups flour till coated and separated. chill.


For dough, in a large bowl combine 1 1/2 cups flour and yeast. Heat and stir the cream, sugar, and salt just till warm (120/130F). Add to flour mixture. Add the egg. Beat with an electric mixer on low to medium speed for 30 seconds, scraping bowl. Beat on high speed for 3 minutes. Using a wooden spoon, stir in the chilled flour-butter mixture till the flour is well moistened (butter will remain in large pieces).


Sprinkle a pastry cloth or work surface with a 1/4 cup of flour. Turn dough out onto the floured surface. With floured hands, gently knead dough for 8 strokes only. With a well-floured rolling pin, roll into a 21x 12 inch rectangle. fold crosswise into thirds to form a 12x7 inch rectangle. loosely wrap; chill 1 to 1 1/2 hours in refridgerator or for 20 to 30 minutes in the freezer or till dough is firm but not excessively stiff.


On a well-floured surface, roll dough into a 21 x 12 in rectangle. Fold dough crosswise into thirds; give a quarter turn. Then roll out, fold into rectangle, and turn, twice more. Flouring surface as needed (it's not necessary to chill dough between rollings). Place in plastic bag. Seal bag, leaving room for expansion. Chill 4 to 24 hours. Fill, shape, and bake as directed in recipes.


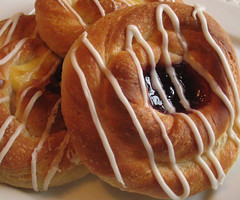
I decided on the classic danish shape and just a seedless raspberry jam right out of a jar and a cream cheese filling.


For the cream cheese filling:

4oz cream cheese, softened
2 tbsp sugar
1/2 an egg yolk (i know kind of tricky, but i halved a recipe and you don't want to add too much or it gets eggy)
1/4 tsp vanilla

combine all ingredients until smooth and set aside until ready for filling.


To shape, on a lightly floured surface, roll chilled pastry dough into a 21 x 12 inch rectangle. Cut dough crosswise into 21-12x1 inch strips. Take a strip, one end in each hand, and twist ends into opposite directions 3 or 4 times. Form into a snail shape and tuck end underneath. Transfer to parchment lined cookie sheet (don't put more than 9 per cookie sheet).


Using your thumbs or 2 fingers, make a 2-inch indentation in the center of each pastry. Spoon 1 rounded Tablespoon of filling into each pastry. i did combination of each raspberry jam, cheese, and raspberry/cheese. Cover and let rise in a warm place (I used my oven with the light on, but remember to take them out before preheating the oven!!) until nearly doubled (45 to 60 minutes).


Bake in a 375F oven for 18-20 minutes or till golden. drizzle with powdered sugar icing.

These made A LOT of danishes so i'm going to freeze some of them and i'll let you know how that goes once I take them out and try them.

Saturday, February 21, 2009

Weekends in the Kitchen: Lemon Meringue Cupcakes


I've been in the kitchen testing out recipes for lemon cupcakes recently and think I have come up with a winner. All I can say is mmmmmmmmm these are yummy. They are a lemon cupcake with homemade lemon curd filling and a fluffy meringue style icing. It's like eating a lemon meringue pie without the crust.

Lemon Curd Recipe

Fluffy Meringue Frosting Recipe
The only alteration I made on this one was I only added about 1/4 tsp of vanilla because I didn't want too strong of a vanilla taste.

Now for the cupcakes themselves, this is the recipe i've been working on and it is still a work in progress. so if you'd like to take a stab at it and send me your feedback all comments are welcome!

Lovely Lemon Cupcakes

1/2 cup (1 sticks) unsalted butter, softened
1 cups sugar
zest of 2 lemons
2 large eggs, at room temperature
1/4 cup sour cream
1/4 cup milk
1/4 cup lemon juice
1 1/3 cups unbleached all-purpose flour
1 1/4 tsp baking powder
1/4 tsp salt

Combine lemon juice and milk and set aside. Cream together butter and sugar until butter turns lighter in color, approx. 4 minutes. Add in lemon zest, sour cream, and eggs and mix until combined. Scrape down bowl. Sift together flour, baking powder, and salt. Add 1/3 of the dry ingredients and mix until combined, then a 1/3 of the milk/lemon mixture and mix until combined. Continue to add a third of the dry and 1/3 of the wet until everything is incorporated.

Spoon into approx. 16 cupcake liners. Bake at 325F for 18-22 minutes or until toothpick comes out clean.

Thursday, February 12, 2009

Broken heart bread


Well i decided that I wasn't going to be prejudice in my tribute to Valentines day and include people who, should we say, are less than enthusiastic about the love sick holiday. So in todays post i'm including one of my favorite bread recipes that can be baked up by one of those mournful souls that have been hurt and just want to take their aggressions out on something that won't try and get revenge back!

Broken Heart Bread

1 cups warm water (110 F/45 C)
32g (3 tbsp) sugar
3/4 tbsp (1 pkg*) active dry yeast *edited to say 1 pkg of yeast
3/4 teaspoons salt
2 tbsp vegetable or canola oil
360g (3 cups) bread flour (i've used AP flour with very good results too)

I do this all in my kitchenaid which makes it all that much easier, but it can be done just as easily without one.

Dissolve sugar, warm water, and yeast in mixing bowl cover with towel and let sit for 10 minutes. It should have a nice foam on top. It means the yeast is working properly.

Add oil and salt and set on lowest speed with paddle attatchment. Gradually add flour about a cup at a time until approx. a cup remains. Switch to dough hook. Add remaining flour and mix on speed 2 for 4 minutes (if not using a mixer this is where you would turn it out onto a floured surface and knead by hand for 7-10 minutes incorporating the last cup of flour).

Scrape down sides and I usually make sure I have the counter very clean and I dump the dough out onto the counter and add a touch of oil into the bowl and put the dough back in the bowl. Turn to coat, making sure to coat the sides of the bowl also. Cover with a kitchen towel and set in a warm, draft-free place. I like my oven with the light turned on. Let proof for 1 hour or until doubled in size.

Punch down dough(again another good way to get aggressions out :). Dust counter with flour and dump dough out onto counter.


Roll dough into log about 12" in length. place on oiled cookie sheet, fold in half and pinch bottom into point.


Cover and place in a warm draft-draft free spot until doubled in size for approx. 1 hour. Again I like to use my oven with the light on.


preheat oven to 350 F (175 C) but remember to take out the bread first if you are proofing them in the oven!!!


Bake for 25-30 minutes or until golden brown and hollow sounding when thumped. for soft crust rub outside with butter or margarine right after taking it out of oven.


You are now ready to get out all of your pent up aggression and rip apart the heart of the person that did you wrong! with out actually having to go to jail, hehe!


On a side note, this works perfect as a nice gift for loved ones on valentines day while still intact :D

Tuesday, February 10, 2009

Valentines heart apple tart

To keep up with my week long homage to Valentines day, I made a free-form apple tart that would be the perfect way to show your sweetheart just how much you love them! It is a little time consuming placing the apples, but aren't they worth it =)?


Crust
1 1/3 c. all purpose flour
1/4 tsp salt
1 tbsp sugar
1/4 c. shortening, chilled
1/4 c. cold unsalted butter, cut into cubes
3 tbsp ice cold water

Apples
4-5 apples (i used mcintosh and they were on the small side)
1 tsp lemon juice
1 tbsp water
3 tbsp sugar
1/8 tsp salt
1/2 tsp ground cinnamon
pinch of nutmeg
pinch of clove
2 tablespoons cold unsalted butter, diced into small pieces

For pie crust: In bowl put flour, salt, and sugar and mix together. Add in shortening and butter, cut in until butter/shortening resembles the size of peas. Add in cold water and mix just until it comes together. Do not over mix! Wrap in plastic wrap and refridgerate for 1-2 hours.

For apples: Place lemon juice and water into bowl and set aside. Mix together sugar, salt, cinnamon, nutmeg, and clove and set aside. Cut, peel, and thinly slice apples and place in lemon juice and water and gently toss. Add in cinnamon mixture and gently toss again.


I used my favorite crust recipe, but any pie crust (including store bought) would work out perfectly.


I rolled out the crust and cut it into a general heart shape.


Then I placed the apples making sure to leave about an 1 1/2" all the way around.


Next I rolled the edge over all the way around.


and then cripped


Cube 2 tbsp butter into small pieces and scatter on top.


Bake at 400F for 20-25 minutes or until crust is golden.

This is best enjoyed with a scoop of ice cream or a dollop of whipped cream!

Happy Valentine's Day!

Saturday, February 7, 2009

sour cream coffee cake

sour cream coffee cake

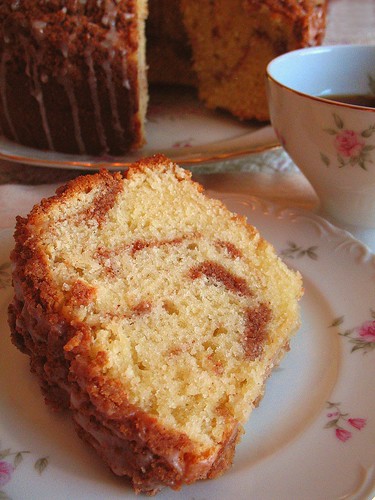
I've been wanting to try this recipe for a while now and i figured today was as good a day as any. Let me tell you this coffee cake is fabulous!! It's so moist and flavorful! A definite keeper! The only changes I made where that I used large eggs instead of extra large and I didn't use the walnuts. I think next time I would double the streusel too.

Sour Cream Coffee Cake
Barefoot Contessa, Ina Garten (food network)

Ingredients:

12 tablespoons (1 1/2 sticks) unsalted butter at room temperature
1 1/2 cups granulated sugar
3 extra-large eggs at room temperature (i used large and it came out just fine)
1 1/2 teaspoons pure vanilla extract
1 1/4 cups sour cream
2 1/2 cups cake flour
2 teaspoons baking powder
1/2 teaspoon baking soda
1/2 teaspoon salt

For the streusel:

1/4 cup light brown sugar, packed
1/2 cup all-purpose flour
1 1/2 teaspoons ground cinnamon
1/4 teaspoon kosher salt
3 tablespoons cold unsalted butter, cut into pieces
3/4 cup chopped walnuts, optional

For the glaze:

1/2 cup confectioners' sugar
2 tablespoons real maple syrup

Directions
Preheat the oven to 350 degrees F. Grease and flour a 10-inch tube pan.

Cream the butter and sugar in the bowl of an electric mixer fitted with the paddle attachment for 4 to 5 minutes, until light. Add the eggs 1 at a time, then add the vanilla and sour cream. In a separate bowl, sift together the flour, baking powder, baking soda, and salt. With the mixer on low, add the flour mixture to the batter until just combined. Finish stirring with a spatula to be sure the batter is completely mixed.

For the streusel, place the brown sugar, flour, cinnamon, salt, and butter in a bowl and pinch together with your fingers until it forms a crumble. Mix in the walnuts, if desired.

Spoon half the batter into the pan and spread it out with a knife. Sprinkle with 3/4 cup streusel. Spoon the rest of the batter in the pan, spread it out, and scatter the remaining streusel on top. Bake for 50 to 60 minutes, until a cake tester comes out clean.

Let cool on a wire rack for at least 30 minutes. Carefully transfer the cake, streusel side up, onto a serving plate. Whisk the confectioners' sugar and maple syrup together, adding a few drops of water if necessary, to make the glaze runny. Drizzle as much as you like over the cake with a fork or spoon.

Tuesday, February 3, 2009

Chocolate mint cupcakes

Chocolate mint  cupcakes

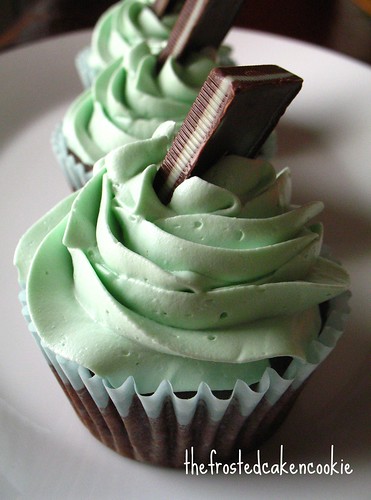
Moist chocolate mud cupcakes with creme de menthe infused italian meringue buttercream and topped with a chocolate mint candy. these were FANTASTIC! it was like eating chocolate mint chip ice cream in cupcake form.

I used this recipe for the cupcakes. (edit: unfortunately the recipe has been removed/private and any good chocolate cake recipe will do).

For the italian meringue buttercream, i used the recipe by warren brown of cakelove. He has a great video over on youtube where he shows you exactly how to make it. To make it the creme de menthe, I just added a few drops of lorAnn's creme de menthe oil and a small amount of leaf green and blue gel food coloring.