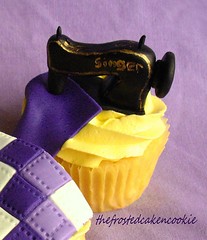
This week i'm going to take a break from my Wallace and Gromit series for two reasons. 1. Its been hotter than all get out here so I haven't really been in the mood to work with fondant , and 2. 100% humidity and fondant don't mix very well, lol. So i'm pulling out a cupcake I made a few months ago. I hadn't intended on making this one into a tuesday topper but i've had so many requests for it that I changed my mind :D. I think i've figured out a pretty simple way to make it and here's what you will need to make one:
-Fondant smoother
-knife
-Fine tipped paintbrush
-Gold luster dust
-Small amount of vodka or alcohol based extract
-I'm not sure why I have the ball tool in the picture because it's not needed, lol.
-knife
-Fine tipped paintbrush
-Gold luster dust
-Small amount of vodka or alcohol based extract
-I'm not sure why I have the ball tool in the picture because it's not needed, lol.
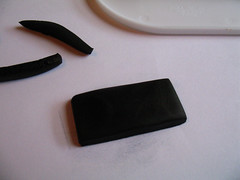
-Roll one of the balls into a log.
-Flatten with fondant smoother.
-Cut edges off to form a rectangle.
-take the other ball and roll into a longer log tapering a bit at one end. Take fondant smoother and just slightly flatten one side, turn and do the same on the other side. (your trying to make it into a box shape.)
-Form into an upside down U.
-On the thicker side, pinch with finger and thumb up towards the top.
-Using fingers again pinch both top corners to make them more defined.
-For the side wheel, take some scraps from the base and make two balls, one larger than the other. Flatten with fondant smoother.
- and with a touch of water attach to each other
-Using some more scraps make a tiny rope and cut two small pegs.
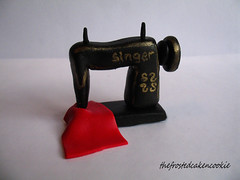
-With some gold luster dust mixed with a very small amount of alcohol, paint some embellishments on the top section and on the edge of the wheel. Let all of the pieces dry over night.
-After you've let them dry overnight, attach the top to the base with water or gum paste glue. Add spindles and wheel, and if you want, a thin square of fondant for the fabric.
Happy Tuesday :D
Happy Tuesday :D


This is the cutest thing I've ever seen !!!
ReplyDeleteOh my goodness! I love this one! Great Tuesday Topper! :D
ReplyDeleteI love this one!
ReplyDeleteThanks for the great idea! I am definitely going to have to make this one.
ReplyDeleteCannot stop saying that I LOVE your tutorials! Thanks again for sharing!
ReplyDeleteThis is so awesome. I sew and I'm just loving the singer sewing machine.
ReplyDeleteThanks so much for your tutorials. I appreciate you sharing your knowledge.
you r just fabulosa!!! =D
ReplyDeleteNilda
Amazing!!!
ReplyDeleteYou have a great imagination ;)
ReplyDeleteThis topper couldn't have come at a better time. Now that I am back into a sewing rage. Love it!
ReplyDeleteawesome ~! so so nice!
ReplyDeleteooooh this is so beautiful.. thank u for showed me how..
ReplyDeleteStumbled upon you blog...ADORABLE!!!!
ReplyDelete1st time here in ur blog....I simply loved ur blog...I'm new to cake decoration n stuff....ur blog gives a good idea....4m now i'll be a frequent visitor....wen u r free visit my foddie blog kavyanaimish.blogspot.com
ReplyDeleteThanks for this amazing tutorial! I'm sure I'll be using this a lot!
ReplyDeleteYou are amazing and you inspire me to make cupcakes every time I go to your blog! Keep on doing what you do best--THANKS!
ReplyDeleteThank you so much for creating this to go along with the rest of the sewing toppers :-) You are amazing "-)
ReplyDeleteI love this! It's amazing!
ReplyDeleteOMG! You did an amazing job!!! I cant't wait to try it!!!
ReplyDeleteLove these! I found your blog looking for tips on making sewing machine toppers and you have some fabulous things here!
ReplyDeleteThese are my new favourite things to make :)
Great work
ReplyDelete