Sorry guys, I seem to have overextended my self and didn't have time to do a topper for this week :(. I'll make sure I have one for next week! Hope everyone is having a terrific Tuesday. See you next week!
Tuesday, August 25, 2009
Share this:
|
Digg It |
Add to Technorati |
Save on Del.icio.us |
Stumble It |
Share on Facebook |
Posted by
Unknown
at
12:12 PM
4
comments


Tuesday, August 18, 2009
Tuesday Toppers: Gromit Cupcake
Well luckily the heat has subsided a bit (unfortunately the humidity hasn't :P) and I can work with the fondant without it sweating too, too much. I just hope next week will be nice too because I'm going to be a busy girl, lol. My oldest daughter is turning 9 and I am going to make cupcakes for school Friday, a cake for her birthday sleepover, and a cake for the family party on Sunday. I have a feeling I'm going to be caked out before the weekend is up! Now for the Tuesday topper, I'm doing my final installment of my Wallace and Gromit cupcakes, Gromit. He's so simple to make and here is what you will need to make him:
-Fondant Smoother
-Knife
-Ball tool
-Paint brush
-Light tan, brown, white, and black fondant
-Knife
-Ball tool
-Paint brush
-Light tan, brown, white, and black fondant
-Take the light tan fondant ball and roll into a fat log with one end slightly tapered.
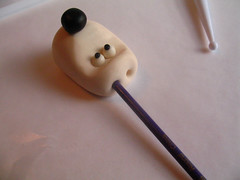
-Using the end of the paint brush and our index finger, form the forehead and the area for the eyes.
-Using the small end of the ball tool, make two indents for the eyes.
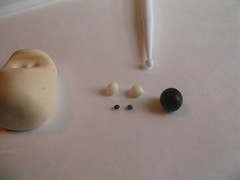
-For the eyes and nose, make two small balls out of the white and two very tiny balls out of the black. With the rest of the black form a ball for the nose. Attach with a small amount of water.
-Using the back end of the paint brush make two holes in the top of Gromits head.
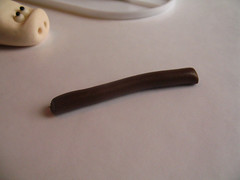
-For the ears roll the brown into a 1/4" log.
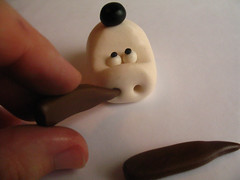
-Cut in half and taper one end. Flatten slightly with the fondant smoother.
-With a small amount of water, insert the ears into the holes.
Happy Tuesday everyone!
Share this:
|
Digg It |
Add to Technorati |
Save on Del.icio.us |
Stumble It |
Share on Facebook |
Posted by
Unknown
at
9:39 AM
10
comments


Labels:
cupcakes,
fondant,
how-to,
wallace and gromit
Tuesday, August 11, 2009
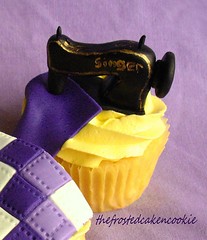
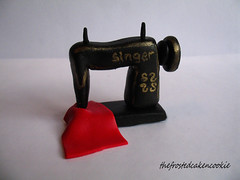
Tuesday Toppers: Sewing Machine Cupcake
This week i'm going to take a break from my Wallace and Gromit series for two reasons. 1. Its been hotter than all get out here so I haven't really been in the mood to work with fondant , and 2. 100% humidity and fondant don't mix very well, lol. So i'm pulling out a cupcake I made a few months ago. I hadn't intended on making this one into a tuesday topper but i've had so many requests for it that I changed my mind :D. I think i've figured out a pretty simple way to make it and here's what you will need to make one:
-Fondant smoother
-knife
-Fine tipped paintbrush
-Gold luster dust
-Small amount of vodka or alcohol based extract
-I'm not sure why I have the ball tool in the picture because it's not needed, lol.
-knife
-Fine tipped paintbrush
-Gold luster dust
-Small amount of vodka or alcohol based extract
-I'm not sure why I have the ball tool in the picture because it's not needed, lol.
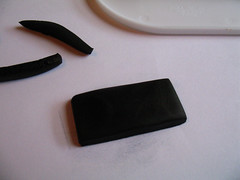
-Roll one of the balls into a log.
-Flatten with fondant smoother.
-Cut edges off to form a rectangle.
-take the other ball and roll into a longer log tapering a bit at one end. Take fondant smoother and just slightly flatten one side, turn and do the same on the other side. (your trying to make it into a box shape.)
-Form into an upside down U.
-On the thicker side, pinch with finger and thumb up towards the top.
-Using fingers again pinch both top corners to make them more defined.
-For the side wheel, take some scraps from the base and make two balls, one larger than the other. Flatten with fondant smoother.
- and with a touch of water attach to each other
-Using some more scraps make a tiny rope and cut two small pegs.
-With some gold luster dust mixed with a very small amount of alcohol, paint some embellishments on the top section and on the edge of the wheel. Let all of the pieces dry over night.
-After you've let them dry overnight, attach the top to the base with water or gum paste glue. Add spindles and wheel, and if you want, a thin square of fondant for the fabric.
Happy Tuesday :D
Happy Tuesday :D
Share this:
|
Digg It |
Add to Technorati |
Save on Del.icio.us |
Stumble It |
Share on Facebook |
Posted by
Unknown
at
11:51 AM
21
comments


Labels:
cupcakes,
fondant,
how-to,
quilting,
sewing machine
Tuesday, August 4, 2009
Tuesday Topper: Wallace Cupcake
Well I finally got to Wallace. Have I said yet just how much I love Wallace? His big cheesy grin, and those teeth are just so funny. He's a little more detailed than some of my other toppers, but he's just too cute, how can you resist :D? So without further ado, here's what you need to make him:
-Fondant smoother
-Knife
-Ball tool
-Paint brush
-Peach, white, and black fondant
-Knife
-Ball tool
-Paint brush
-Peach, white, and black fondant
-Take large ball of fondant and flatten slightly with fondant smoother.
-Pinch one end of the disk forming a pear shape.
-Using the small end of the ball tool make indents in the shape of a smile. Then smooth it out and make it so there is a lip all of the way around.(this is where you will insert the teeth)
-Take end of paintbrush and gently push down while pressing the top of the head to form the forehead.
-Using the small end of the ball tool, make two holes for the eyes.
-Take the white fondant, roll into a log, and flatten with fondant smoother or rolling pin.
-Cut 1/4" strips for the top and bottom teeth.
-Using the knife make marks for the teeth, then at each mark push the tip of the knife inward slightly to define the teeth more.
-insert the bottom set of teeth pushing them under the lip you made.
-Take some leftover white fondant and place it in the mouth (this helps support the upper teeth)
-Insert the top teeth and using some more excess fondant make two small balls for eyes and put them in.
-Make two very tiny balls of black and apply them to the eyes pressing gently to flatten them. Then take one of the smaller balls of peach and apply to face.
-Using the back of the paintbrush, make holes for the ears.
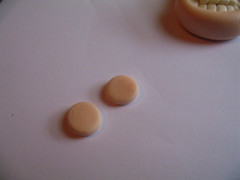
-To make the ears cut the other ball of peach in half, roll into balls, and flatten into disks.
-Pinch one side and roll it to make a point. Then taking the small end of the ball tool again, make a small indent. Insert into holes in the head.
How can you not smile at this! :D
Happy Tuesday
Happy Tuesday
Share this:
|
Digg It |
Add to Technorati |
Save on Del.icio.us |
Stumble It |
Share on Facebook |
Posted by
Unknown
at
11:18 AM
20
comments


Labels:
cupcakes,
fondant,
how-to,
wallace and gromit
Subscribe to:
Comments (Atom)


