home about recipes how-to bookstore contact

Thursday, April 29, 2010

Barbie skirt tutorial

In my last post I promised that I would show you how to do the barbie cake I made for my daughters 4th birthday. Unfortunately it looks like I'm only going to be able to show you how to do the skirt part and you will have to use your imagination and my written directions for the bodice. About a month ago I dropped my camera :(. Now it seems as though it is slowly dying on me. More about that later though.

Barbie Cake


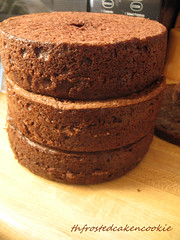
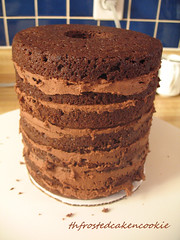
First I started out with 4- 6" cakes (yes I know there are only 3, lol, just imagine all of them are there :).

barbie skirt tutorial 1

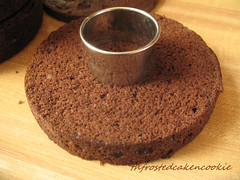
Cut each layer in half (this isn't necessary I just do it because I like the icing cake ratio), and using a 2" cookie cutter, cut a hole in the center of each layer.

barbie skirt tutorial 2

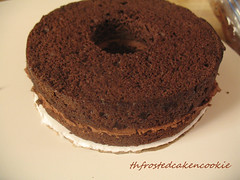
Now layer the cake and icing being careful to keep the holes in the center lined up.

barbie skirt tutorial 3

Chill the cake for a few hours so it has a chance to firm up and will be easier to carve.

barbie skirt tutorial 4

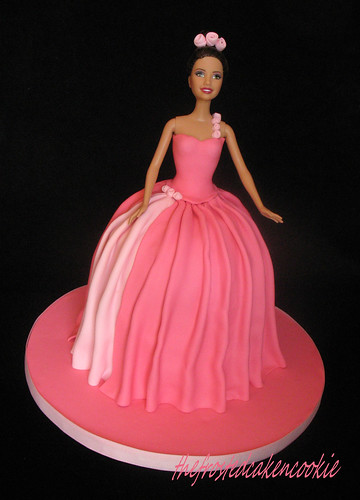
For the barbie I used a new one so that it could be a gift for the birthday girl afterward. In order to make her food safe you need to wrap her bottom half in plastic wrap before you insert her into the cake. It also helps with cleanup!!

barbie skirt tutorial 5

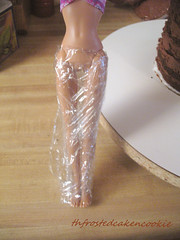
Place the wrapped doll into the hole of the chilled cake.

barbie skirt tutorial 6

And carefully carve a rounded top for the skirt. I had to add a little bit at the top of the skirt to hide the opening.

barbie skirt tutorial 7

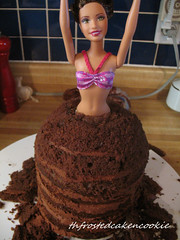
Ice the cake and return to the fridge to chill while you work on the fondant.

barbie skirt tutorial 8

Now on to the skirt.


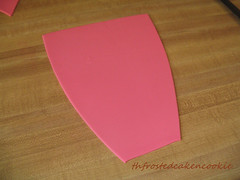
Roll out your fondant to 1/8" thick and about 6" x 10" rectangle. Then taper one end so it looks like the picture. The reason for this is to create less bulk at the top of the skirt.

barbie skirt tutorial 10

Pleat the fondant piece and pinch at the top.

barbie skirt tutorial 11

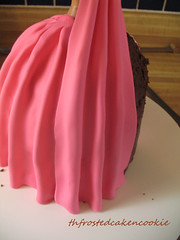
Bring cake out of fridge and spray with water or brush with piping gel so fondant will stick. Drape on the first piece and pinch and cut at the waist being careful not to cut too short.


barbie skirt tutorial 9

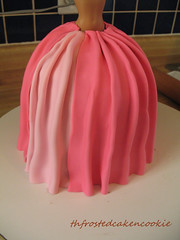
Wet the first pieces edge and then drape the next piece, overlapping the first piece. Pressing down gently on the seam where the two pieces meet. Continue like this until you go all the way around the dress.

barbie skirt tutorial 12

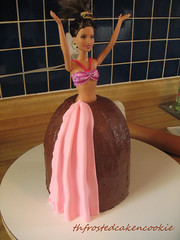
All the way around, now on to the top.

barbie skirt tutorial 13

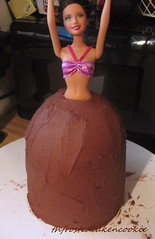
This is where my camera ate my pictures, or just decided it didn't like them enough to keep them :P. So for the top I just made a long rectangle that I made a v in the bottom and put it up against the barbie and marked where i needed cut for the top of the bodice. Then I cut a second v for the top. I trimmed the pieces to fit in the back and I was finished. Now you can use this method for the skirt and decorate it any way you want. With buttercreme or fondant and you can use any doll really. There are Disney princess dolls out there that would work great with this method too.

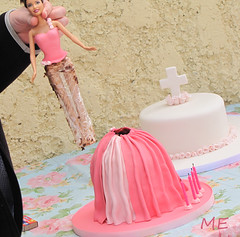
I just had to share this picture with you. It was a picture my sister took at the birthday party and for some reason it just struck me as funny/odd. I'm just glad I chose to make the baptism cake red velvet and not the barbie cake ;)

barbieskirt14


Happy Caking :D

Monday, April 26, 2010

Birthday's and Baptism's

My little baby turned 4! I'm not sure where the time has gone. It just seems like yesterday that I was losing sleep and wishing that she was out of diapers and able to walk and the fun independent things you look forward to with your precious little baby. Of course we eventually got what we wished for and were faced with newly discovered independence and then the terrible two's and then we're blessed even more with the terrible three's. So now as we dive into the 4's I look back and think about how much I miss all of those stages (of course I miss some more than others ;) but I've come to the conclusion that I really need to enjoy every moment with them. It just goes by so quickly. Because before I know it I will be sending them off to college and it will just be me and the hubby again.

Well last weekend we had her birthday party and we also had her baptized! It was quite a special day for all of us! And me being the cake person I am, I had to make a cake to celebrate each occasion. She has just recently gotten into barbies and decided that she wanted a barbie cake. Now I'm not a big fan of the doll kit cakes! I think most of them look like you stuck a doll in a mound of icing up to her ta ta's. Nothing against the decorators, it's just a bad design. So I went about making my own "skirt" and using an actual doll that the birthday girl can have as a gift after the party. I'm going to post a tutorial on how I made the skirt sometime this week.

Barbie Cake

For the baptism cake, I went simple and used a cross and the ribbon roses, her middle name is rose so it was very fitting.

Baptism Cake


Now for those of you wondering how I have been feeling, I have been doing a lot better. Not 100%, but much better. Thanks again for all of your thoughts and prayers. It means so much!

Happy Caking!
Julie :D